In this tutorial you will learn , how to add a new company parameter table of the type Simple. Simple table has only two fields - – Name (which serves as a unique key) and Value. and Once created, the table can look in the application page like this:

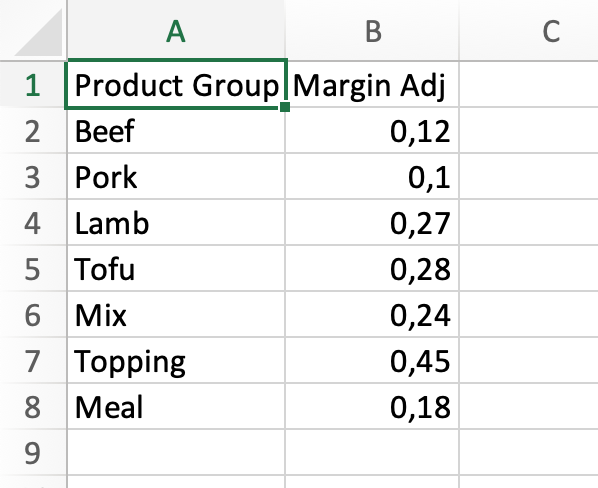
Let’s say you have the following data file and need to create a table suitable for storage of storing such data. The number in the second column is a percentage value.

Create
the new company parameter tableNew Company Parameter Table
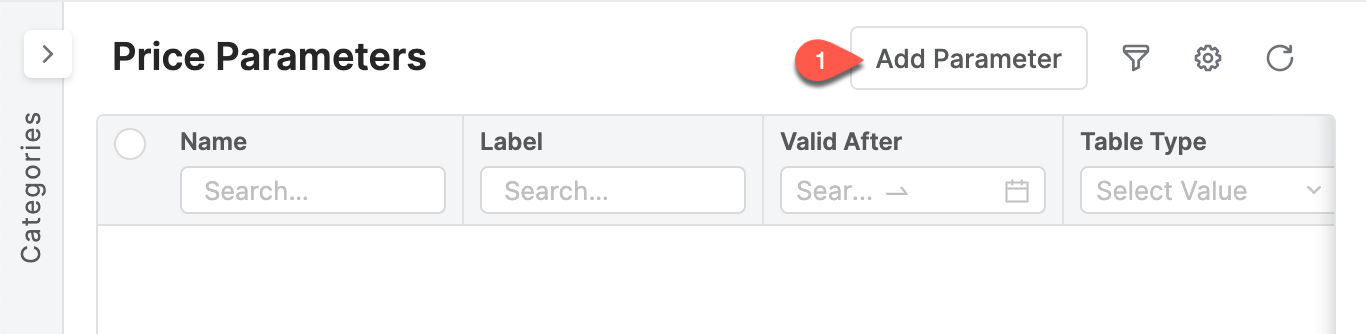
From the toolbar menu, navigate to Company Parameters.
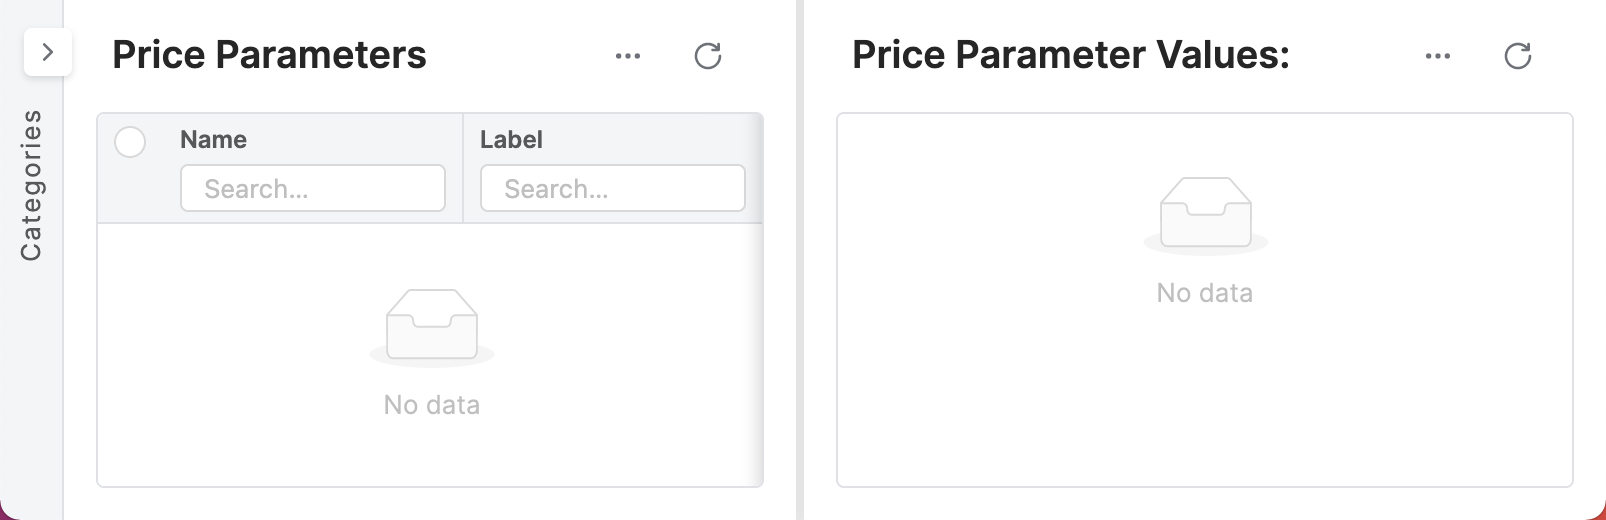
It You will lead to see a page with list of listing all existing company parameter tables. In the screenshot below, there are no Company Parameter tables yet.

Click on the Add Parameter button to create a new company parameter table.

In the dialog, set up

fill in the following fields:
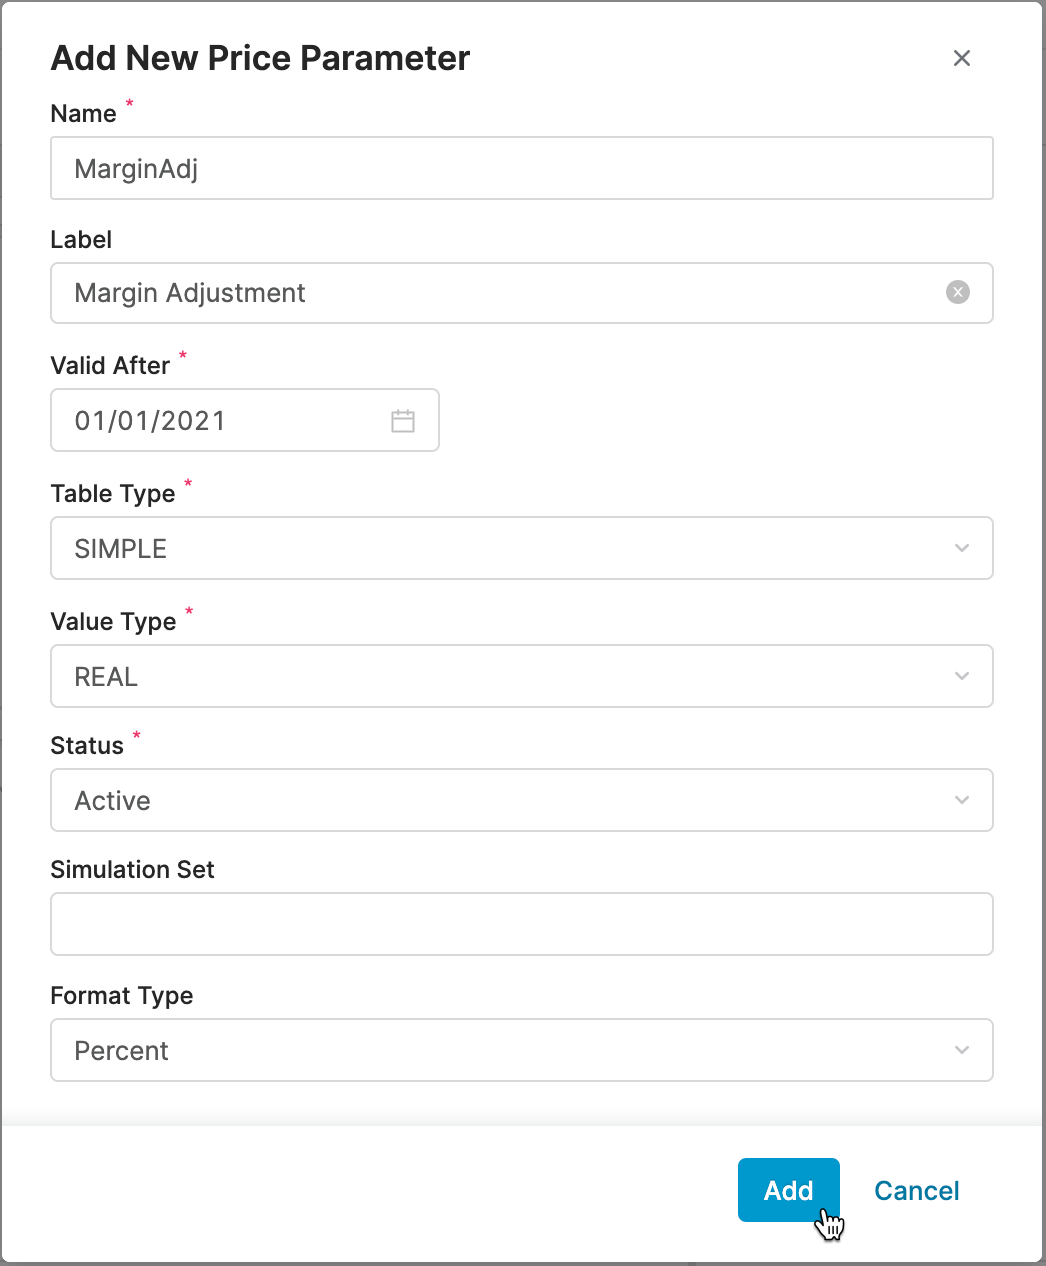
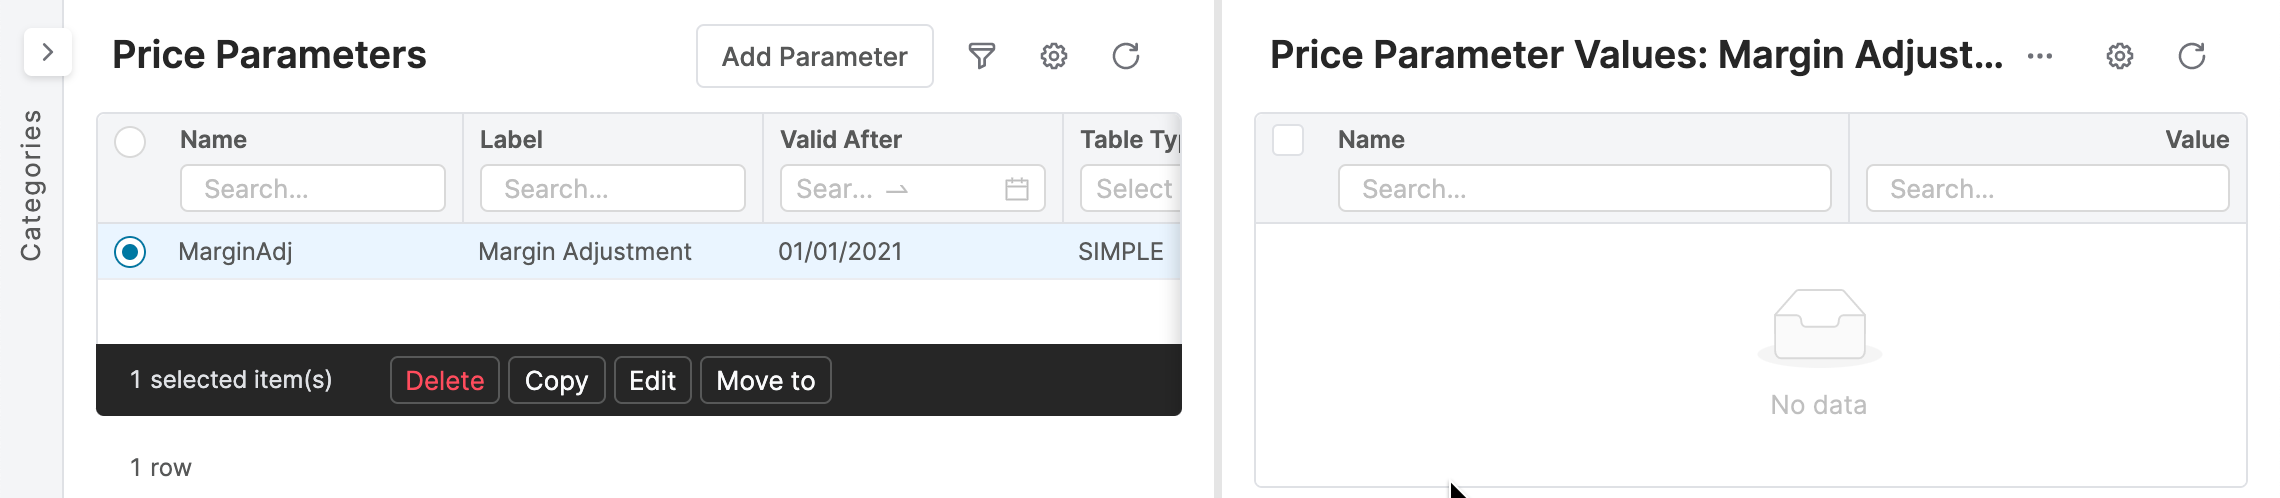
Give the Company Parameter a Name: “MarginAdj”. Enter the name with no spaces. The Name is used in logics to refer to the table , and to lookup look up values in the table. The combination of the Name and Valid After value must be unique across all Company Parameters.
Label: “Margin Adjustment”. The label is optional since it is only used for visualization. If no label has been is specified, the name will be used as a label by the frontend application.
Valid After: “1/1/2021” (or a date prior to today’s date). This date specifies the effective date of the company parameter on for price calculations. Consider this value the “Effective Date”. In this example, this company parameter is effective/valid from 1/1/2021.
Select the Table Type from the drop-down menu, choose Simple. This selection determines number of columns, and - – in case of simple tables - – also the data-type of the Name column of the newly created table. Tables of simple type only have Simple tables have only two columns: one column for the key and the other for the value. The columns in these table types cannot be renamed.
Select the Value Type from the drop-down menu, choose Real. This selection determines the data-type of the Value column with Value.
Select the Status from the drop-down menu, choose Active. Such table could be looked up during calculations. If you make the table inactive then , it will "sit" still remain in the system, but you cannot use it for calculations.
Select the Format Type: Percent.
| Note |
|---|
| Company parameters can have the same Name if they have different Valid After dates. For data lookups during price calculations, the proper "version" of the table will be selected based on the Valid After date and calculation date (called Target Date). |
Click Add to add this new Company Parameter.
Review the new table - – when you click on the name of the Company Parameter, it will show the content of the table on the right side.
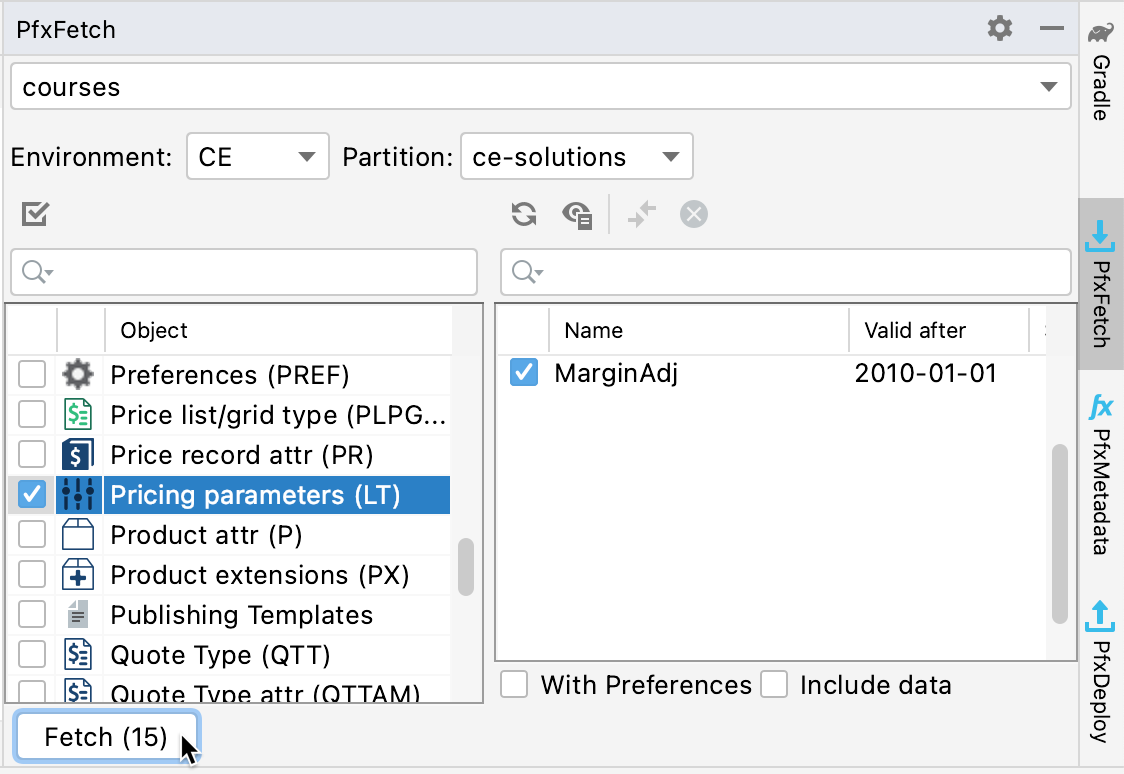
Fetch
theCompany Parameter
fields metadata to your projectIn caseFields Metadata to Your Project
If you already have your project set up in IntelliJ and also the connection to a partition is also set up, fetch the new fields ' metadata to your project, so you can store it to Git.
In Studio, open the PfxFetch tool, select the proper project, environment and partition, then click on Pricing parameters (LT). Refresh the list of company parameters (it will reload from the partition) and select the newly created table.
Click Fetch to download the meta metadata to your project.