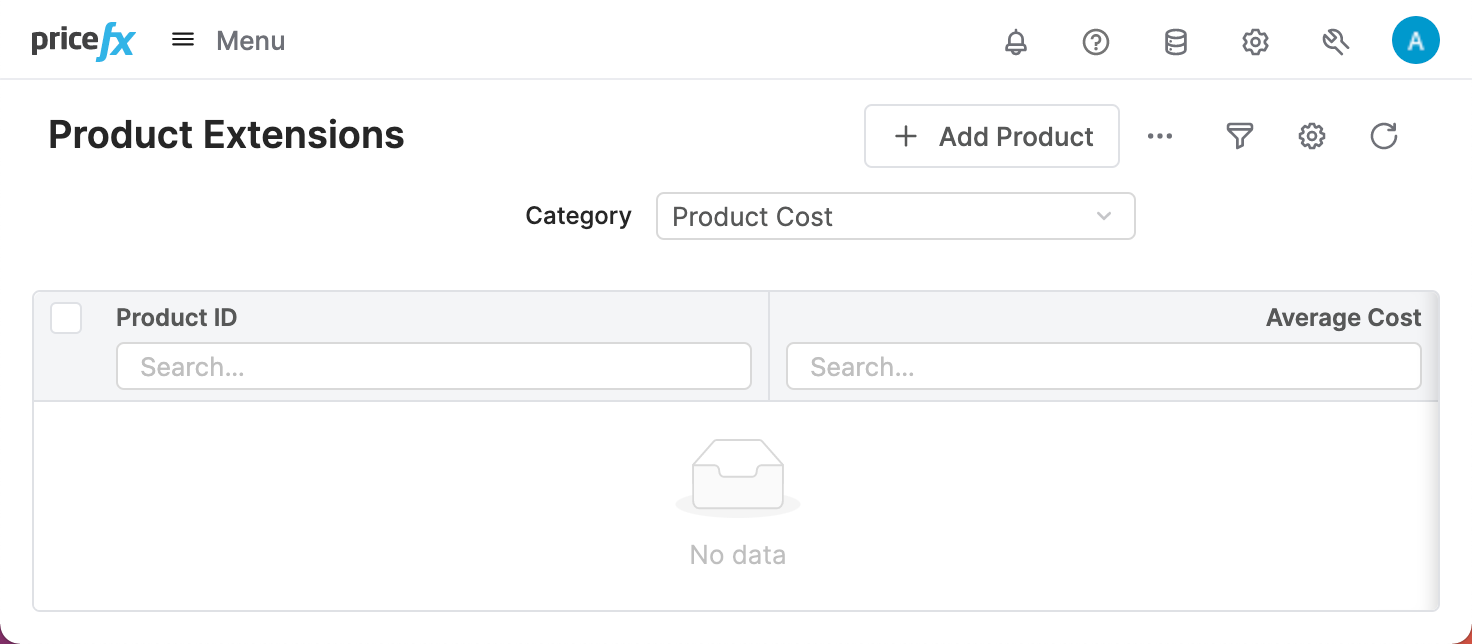
In this tutorial you will learn how to create a new product extension table , setup and set up its columns and preferences. The result can then look in the user interface like this:

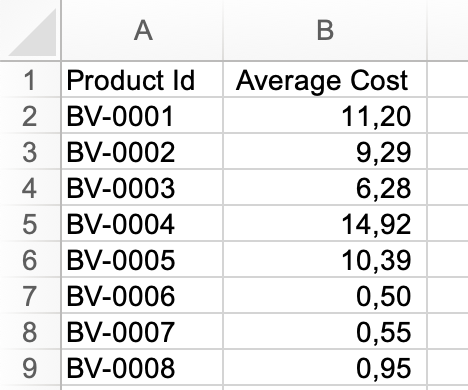
Let’s say you need to store data , which look like on the screenshot and plan to store them in a product extension table. In this sample, the number in the column Average Cost keeps represents the product cost of one product in Euros.

Create
a new product extension tableNew Product Extension Table
In Pricefx user interface, navigate to .
On that page, click on the Add button to add a new product extension table.
In the dialog, fill the Name, Label and Size of the table.

in the following:
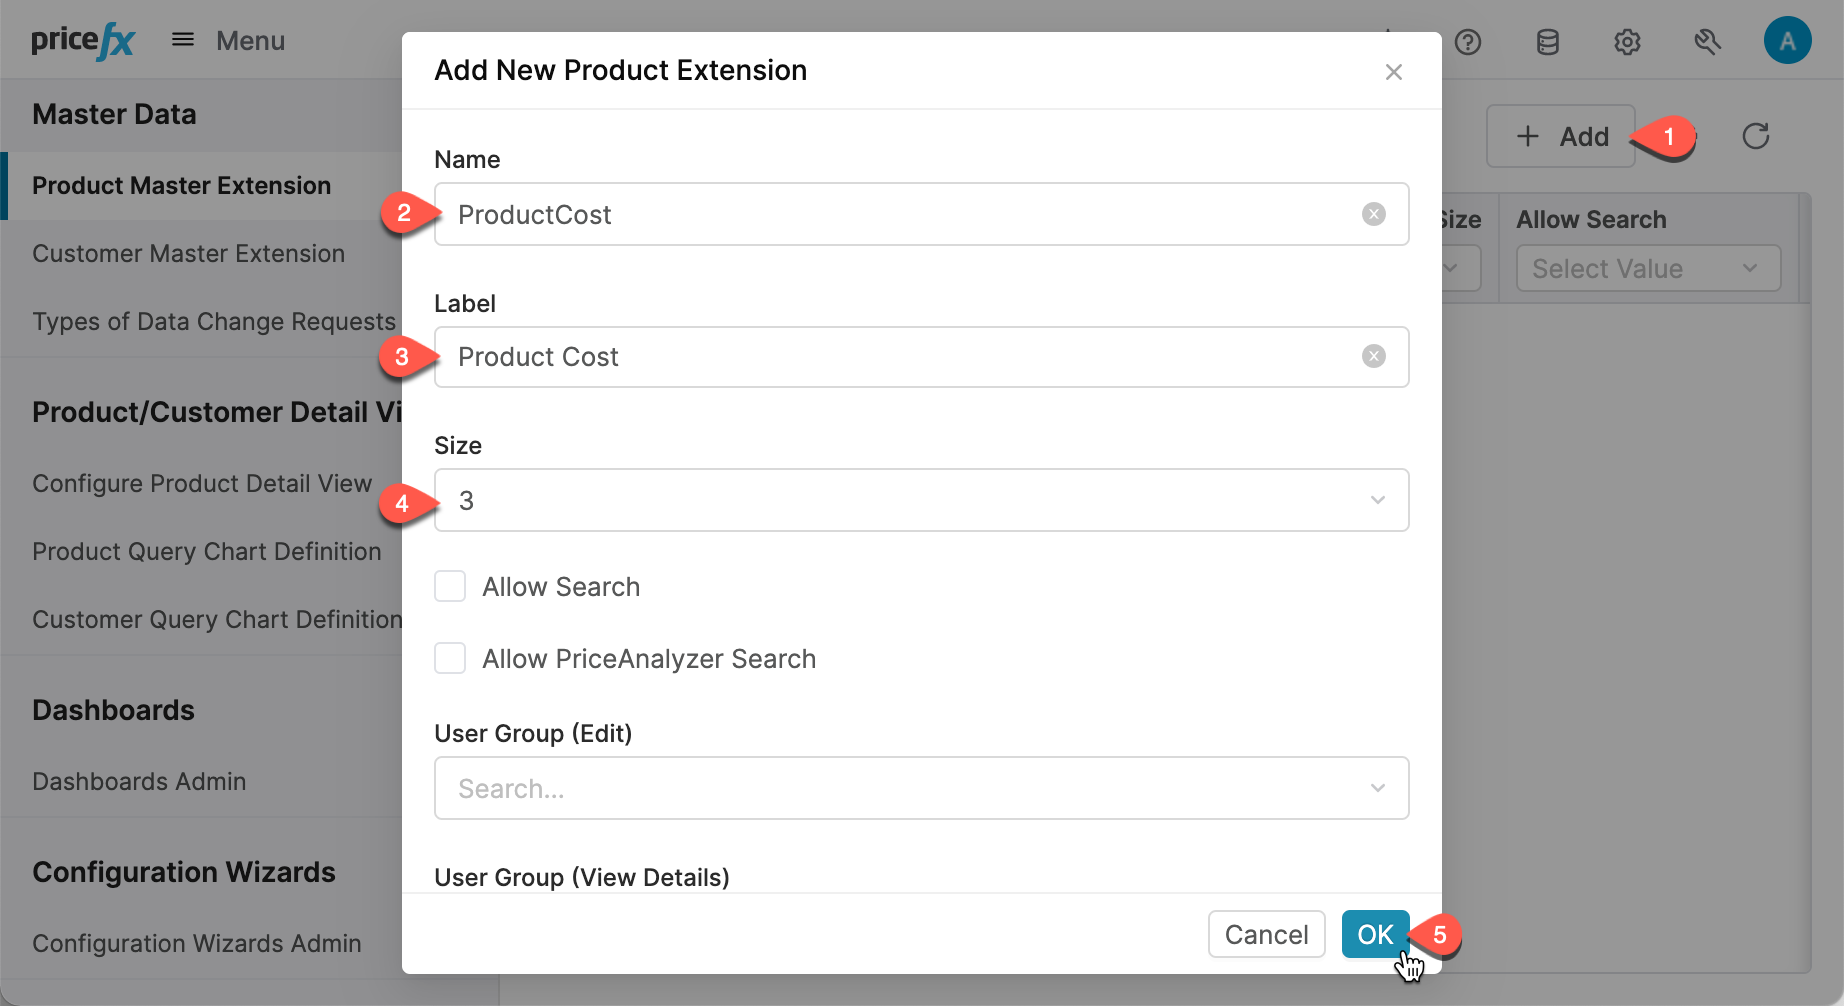
Name = ProductCost. The name is used in the calculation logic when you need to read data from this table.
Label = Product Cost. Used only in the user interface to identify the product extension table.
Size = 3. The maximum number of Attribute# fields in a data row. This does not include the out-of-the-box fields, like skuSKU, etc. In our example, we need only the Average Cost, so we use the lowest value which is 3.
Click OK to save the setup.


Select the new Product Extension by clicking on the name of the new Product Extensionits name. Once selected, the right side of the screen displays the current fields of the master table.

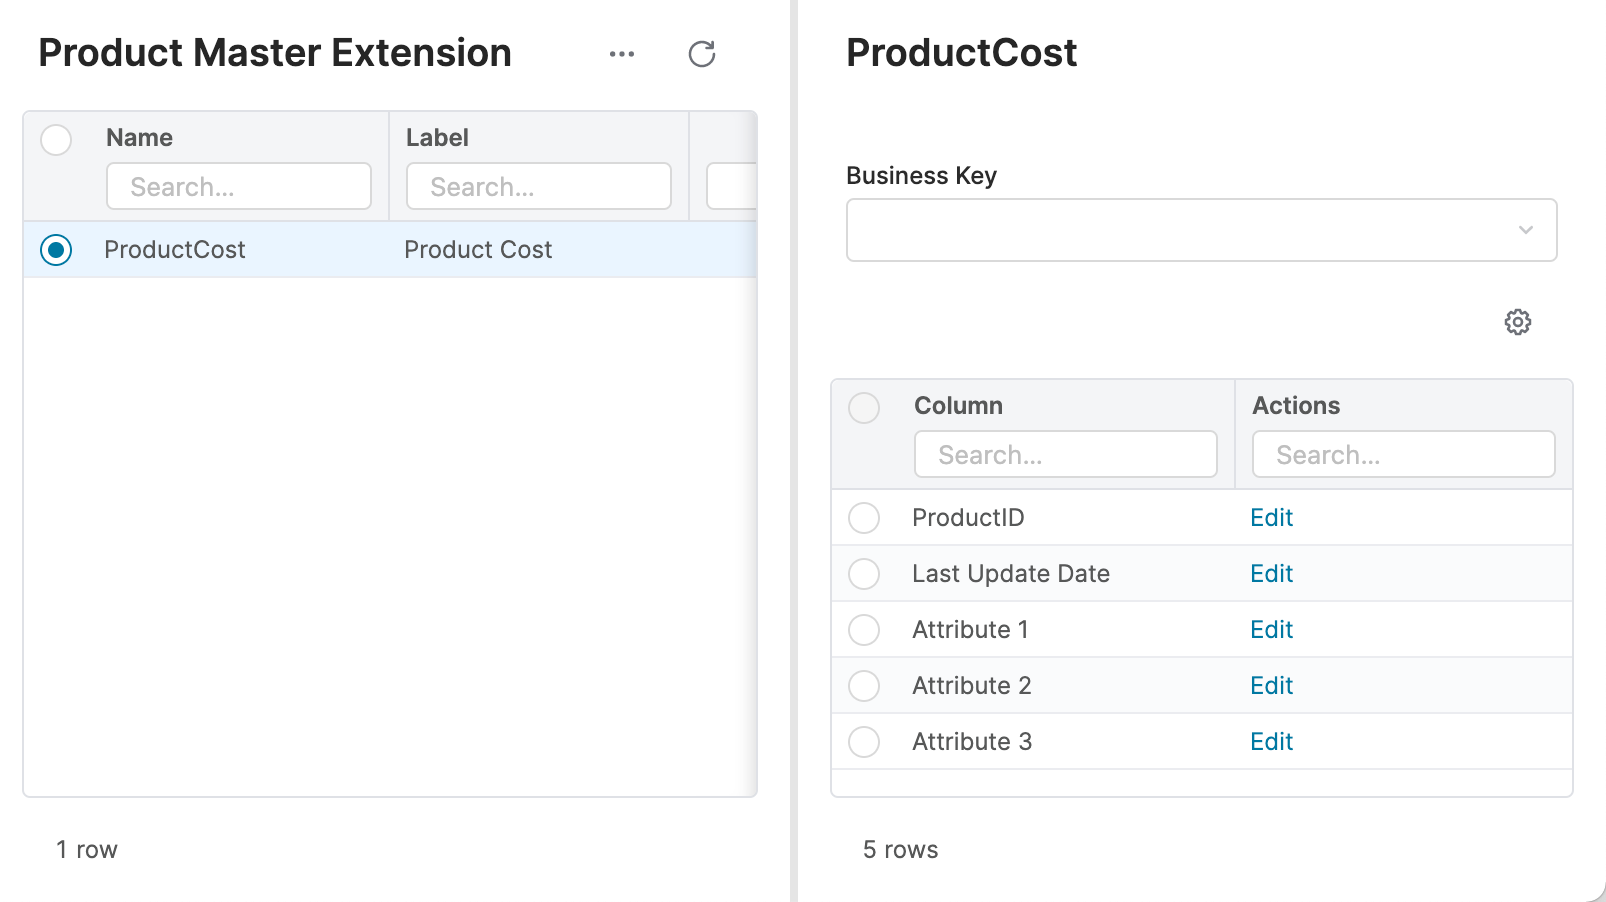
Click on Edit action for the Attribute1 field.

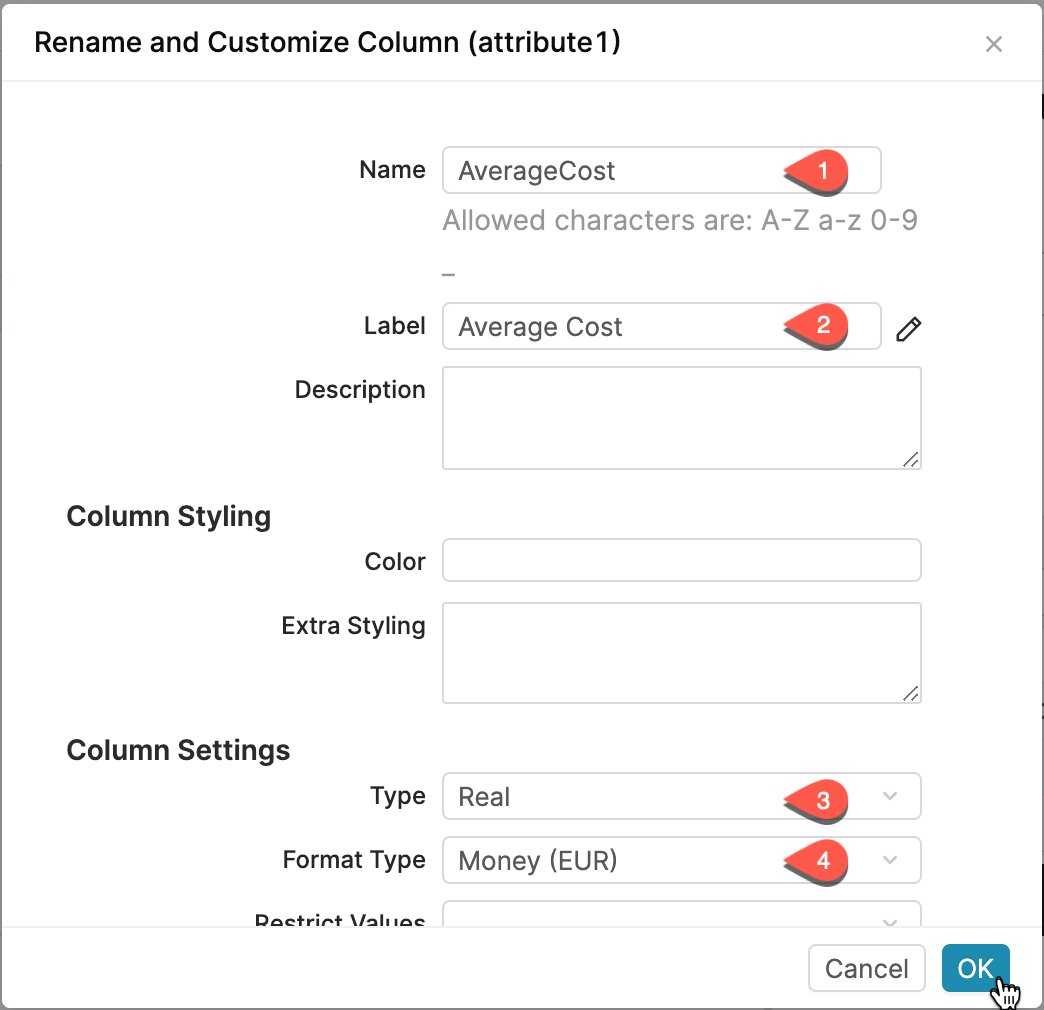
Name = AverageCost
Label = Average Cost
Type = Real
Format type = Money (EUR) (noteNote: this does not set up any currency conversions, it only defines how the value displays is displayed on the screen.)
Click OK to save the field definition. When the confirmation dialog appears, do confirm the change.
View
the newly createdNewly Created Product Extension
tableTable
From the toolbar menu, navigate to .
On the Product Extensions page, click on the Category dropdown boxdrop-down menu.

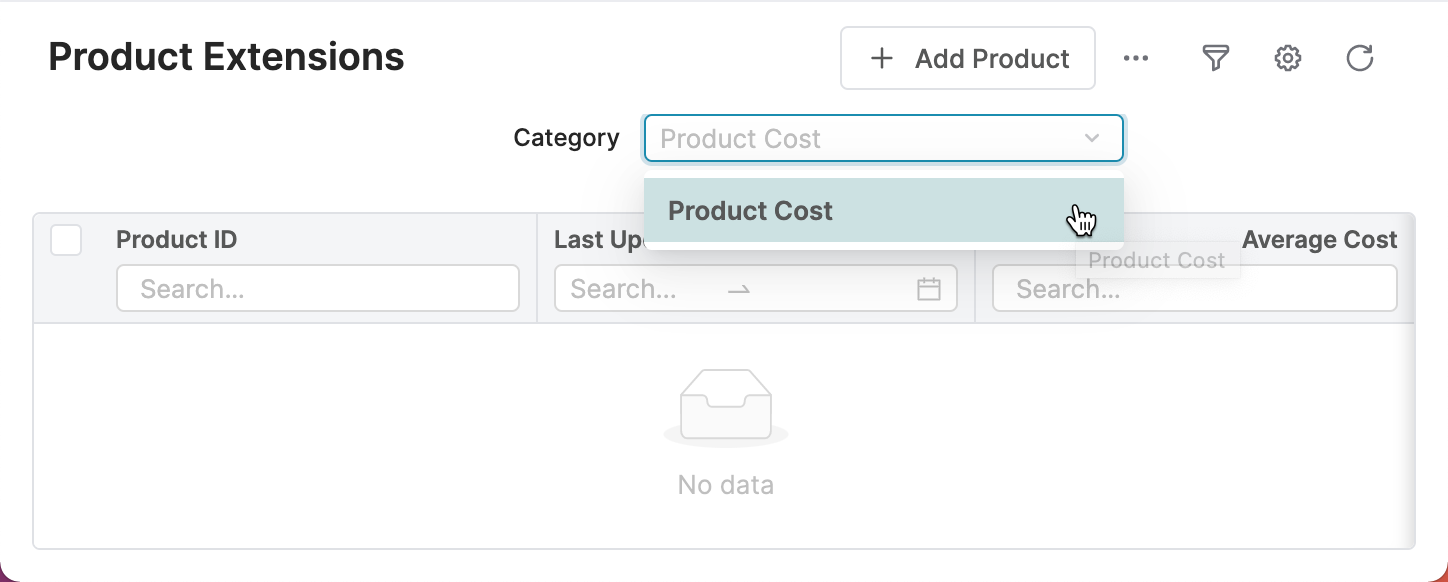
Review the result. There are no records yet, but you can see the configured fields.
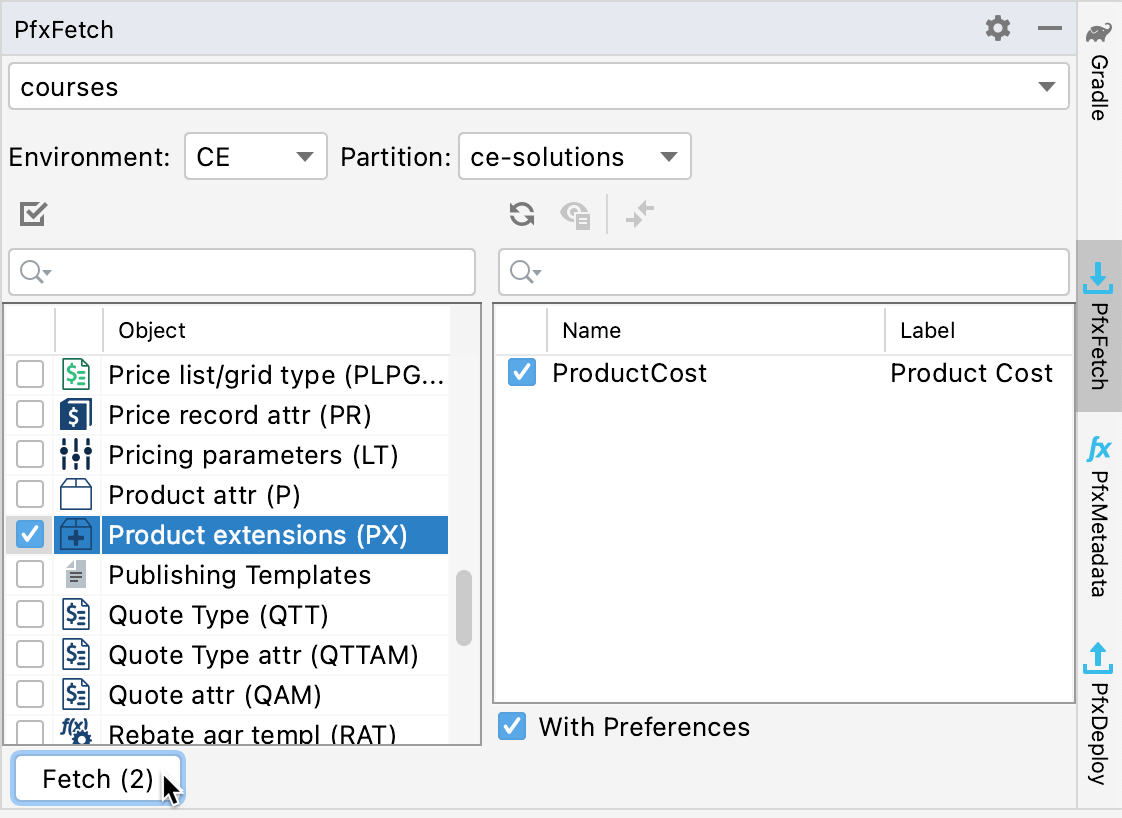
Fetch
theProduct Extension
fields metadata to your projectIn caseFields Metadata to Your Project
If you already have your project set up in IntelliJ and also the connection to a partition is also set up, fetch the new fields ' metadata to your project, so that you can store it to Git.