In this tutorial you will learn how to configure fields of the product master table. The configured table can look like this:

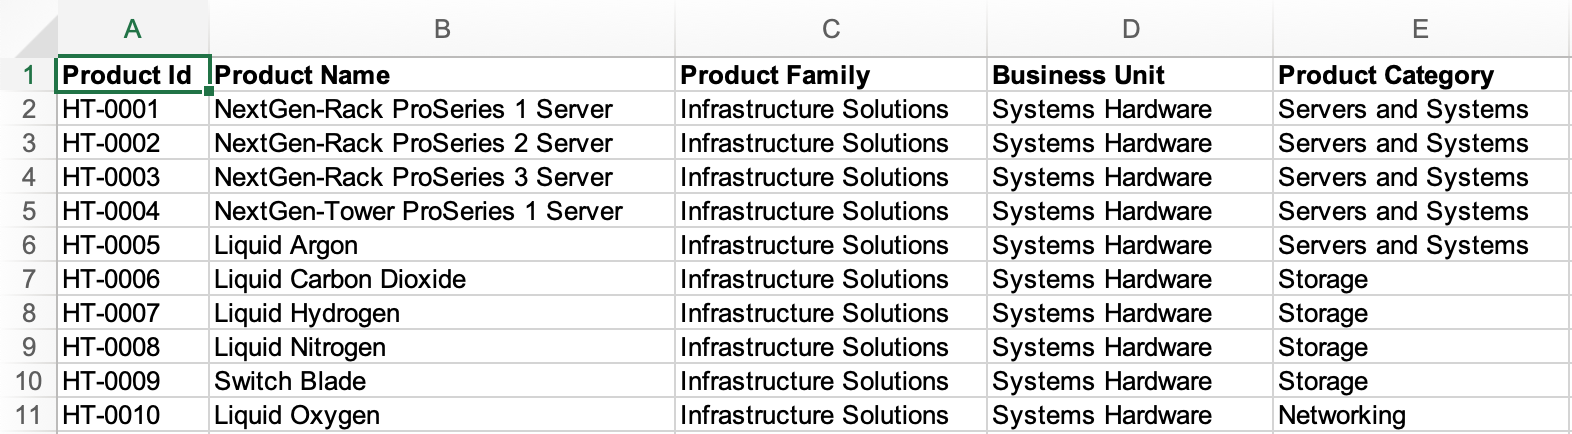
Let’s say you have the following data file and need to create a table suitable for storage of such data.

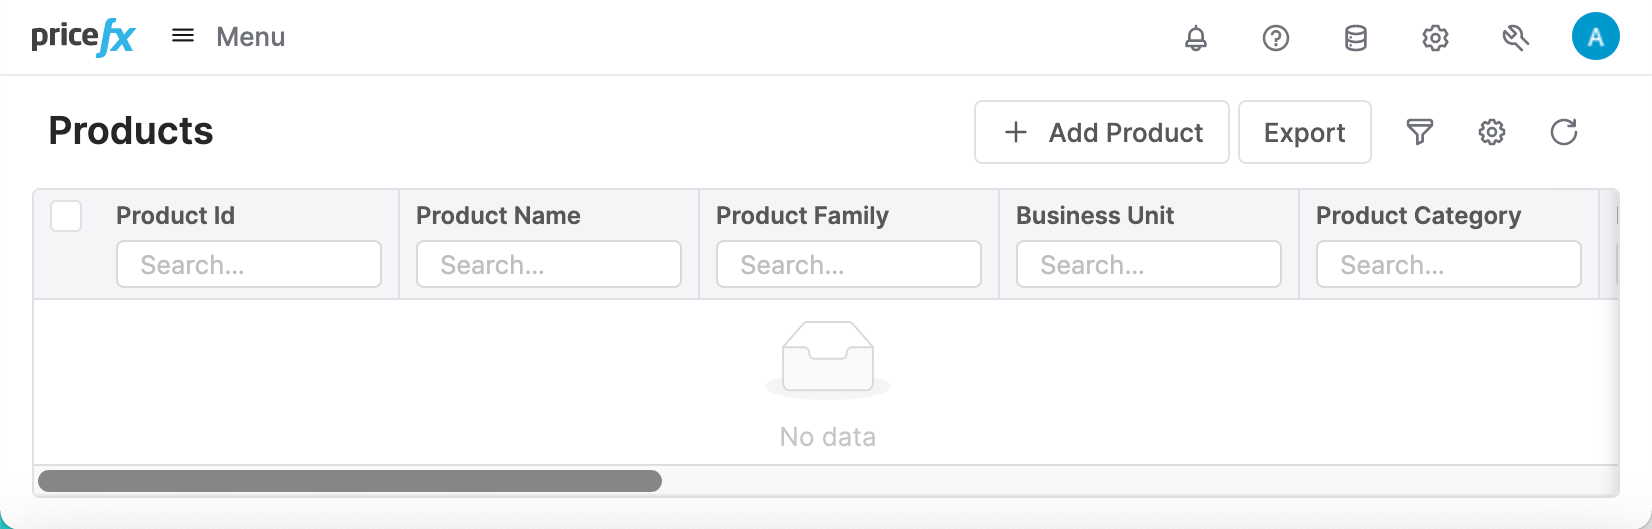
Review Current Product Master Table
Navigate to
The Products master table exists out of the box, but not all the field labels match the labels in the ProductMaster CSV file. When you hover over the column label, a tooltip will display the name of the column in the backend database.


From this table layout we can see that we have a standard set of defined columns: Product ID, Label, Product Unit, Currency, Last Update and Pricing Logic. These columns have special meaning and you cannot rename them or change their data type.
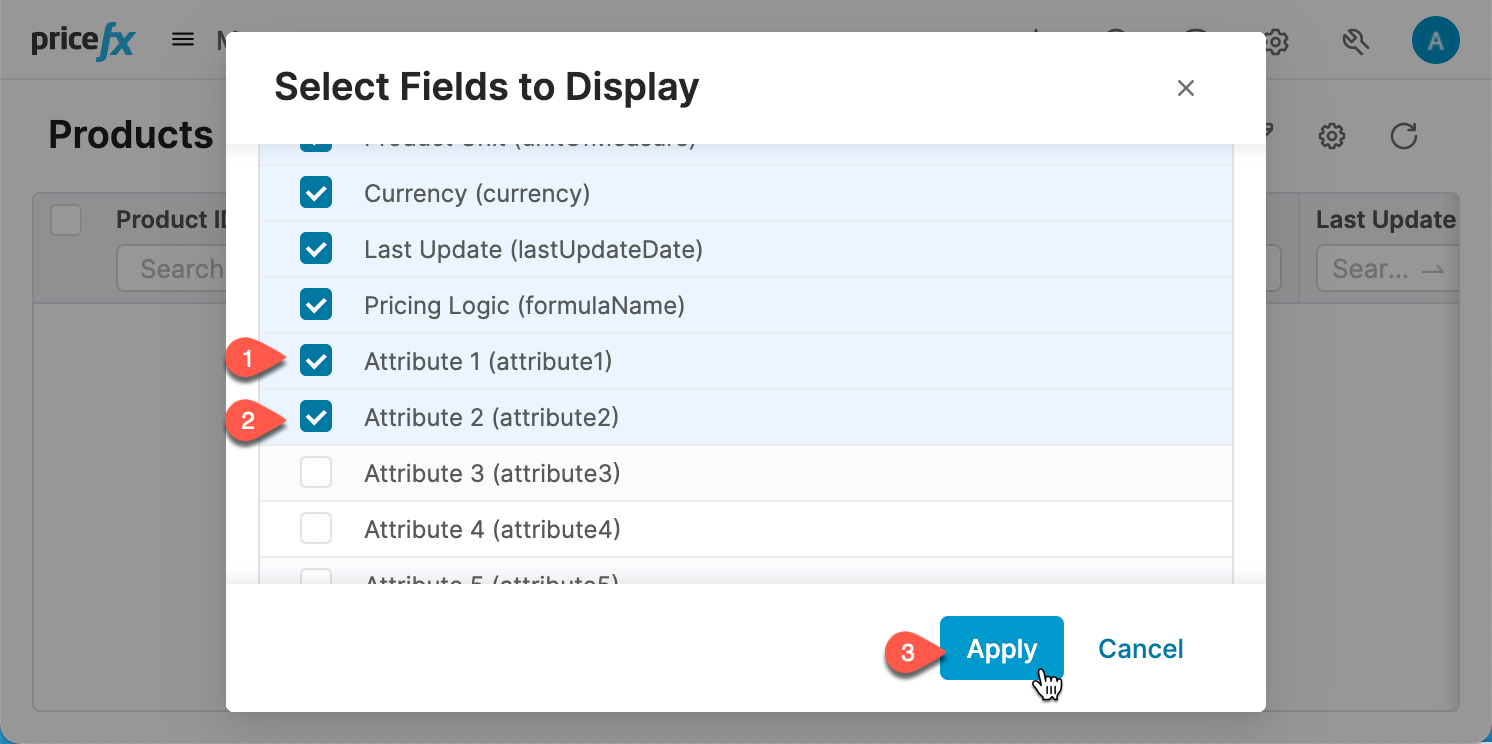
Additionally, we have 30 customizable columns that are labeled as Attribute1, Attribute2, etc. These are customizable fields and we will rename them to match the incoming columns of our CSV file. Since they are not visible by default, let’s make them visible first.
Click to select the fields to display.


Display fields Attribute1 and Attribute2.

When you need to display more fields (or hide some of them), use the same approach.
...
Configure Products Master Table Fields
We recommend to set up the column labels, names and data types according your dataset, as it is the way how it will be used and shown in the solution. Here is an example.
Configure the field Attribute1
To open the field context menu, right-click the label of the Attribute1 column, or click the three dots (this button appears only when you hover over the column label).

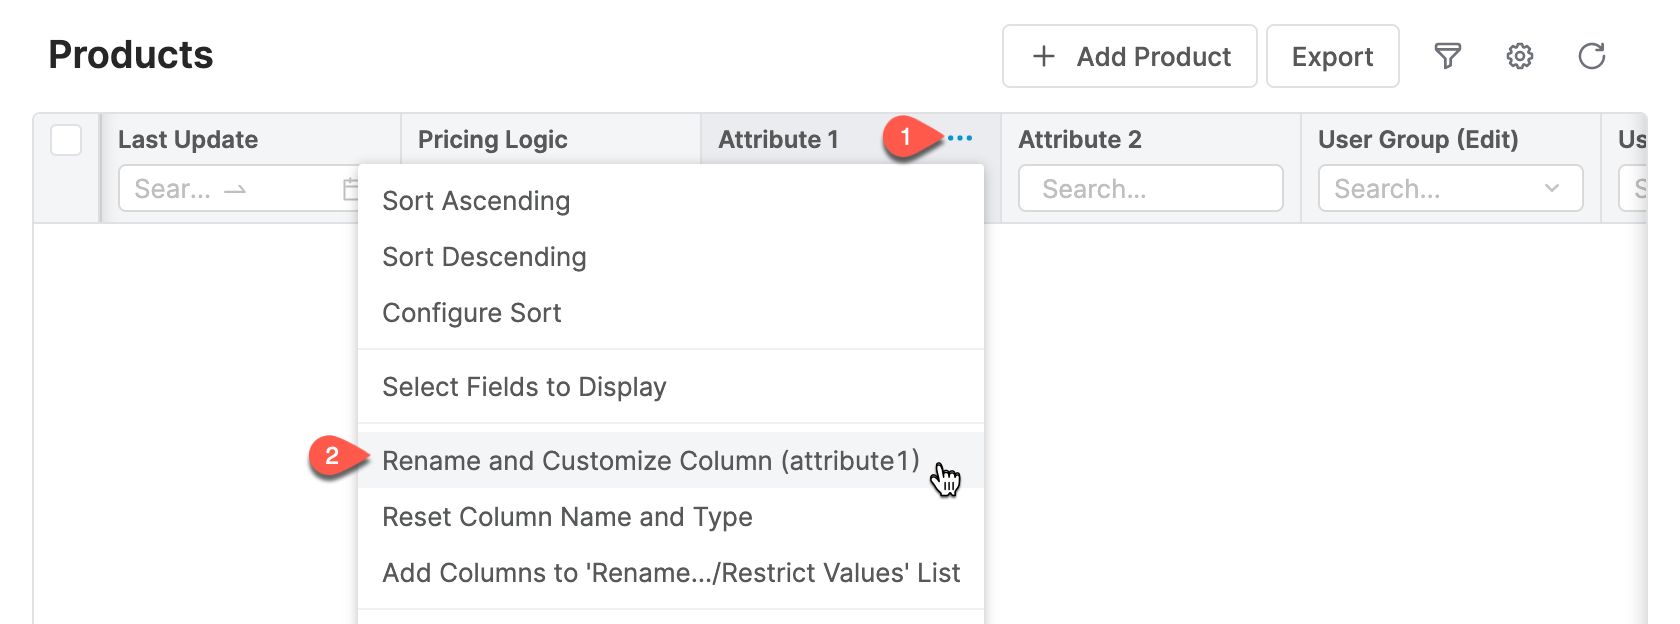
Click Rename and Customize Column. A dialog will open.

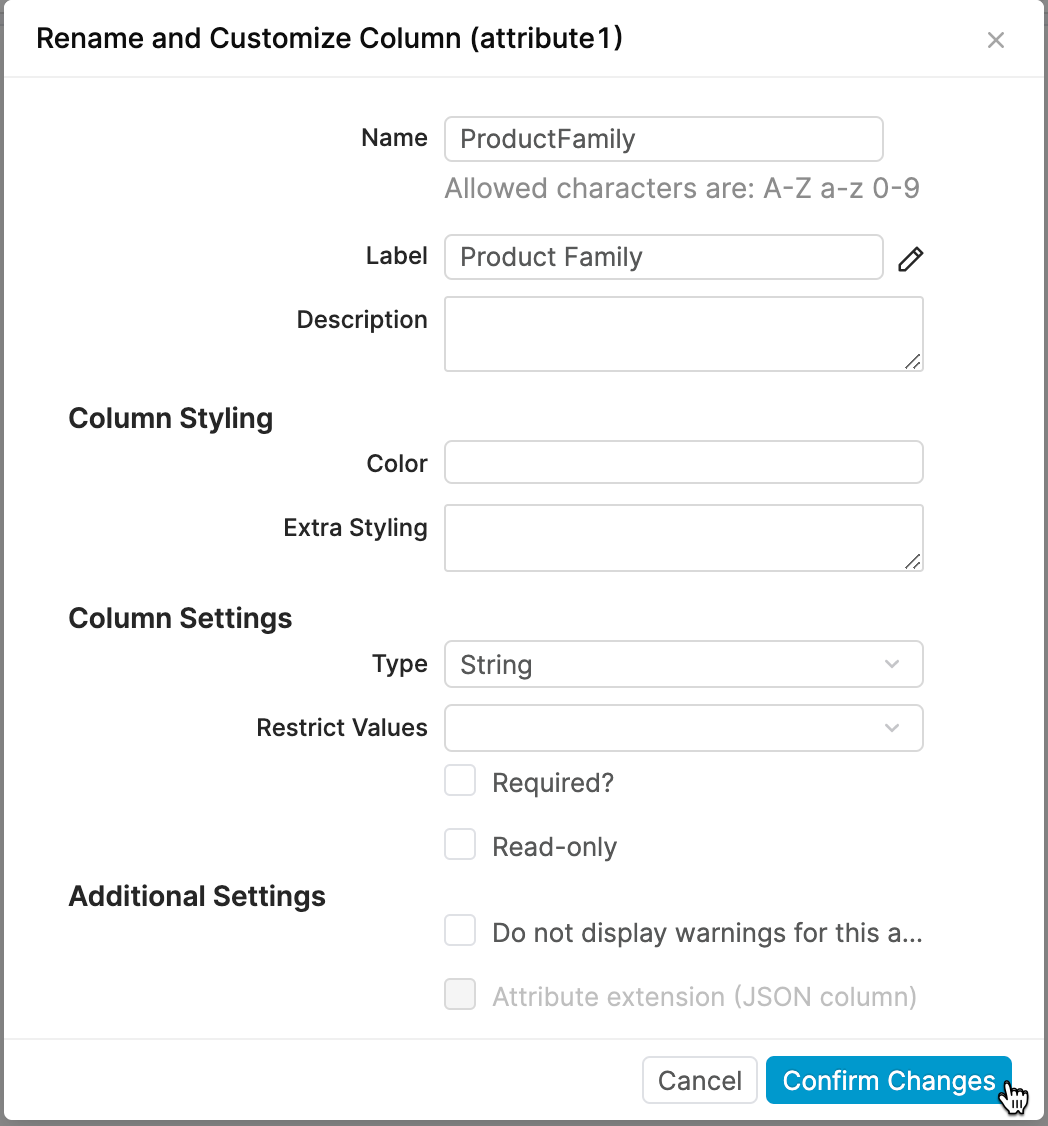
Rename the field to "ProductFamily" (no spaces allowed in names).
Set the label to "Product Family", as it was in the data file.
Set the Type to String.
Click Confirm Changes. A confirmation will come up, so confirm the change.
Repeat the steps above for all the other columns in the CSV file using the following assignments (set both Name and Label for each field, Name still cannot have spaces).
Attribute2 = Business Unit
Attribute3 = Product Category
Attribute4 = Product Group
Attribute5 = Product Type
Attribute6 = Product Class
Attribute7 = Discount Family
Attribute8 = Industry
Attribute9 = Product Group Id
Some of the columns in your data file will be aligned with some of the columns that are provided in the Products master table out-of-the-box. See the previous section about mapping. For such fields you can change only labels.
Change the label of the SKU.
To open the field context menu, right-click the label of the Attribute1 column, or click the three dots (this button appears only when you hover over the column label).
Click Rename and Customize Column. A dialog will open.


Change the Label to "Product Id".
Keep the setting of Required as it is (most fields are not required).
Click Confirm Changes. A confirmation will come up, so confirm the change.
Repeat the steps above for all the other columns in the CSV file using the following assignments:
label – set label "Product Name"
unitOfMeasure – set label "UOM"
currency – set label "Product Currency"
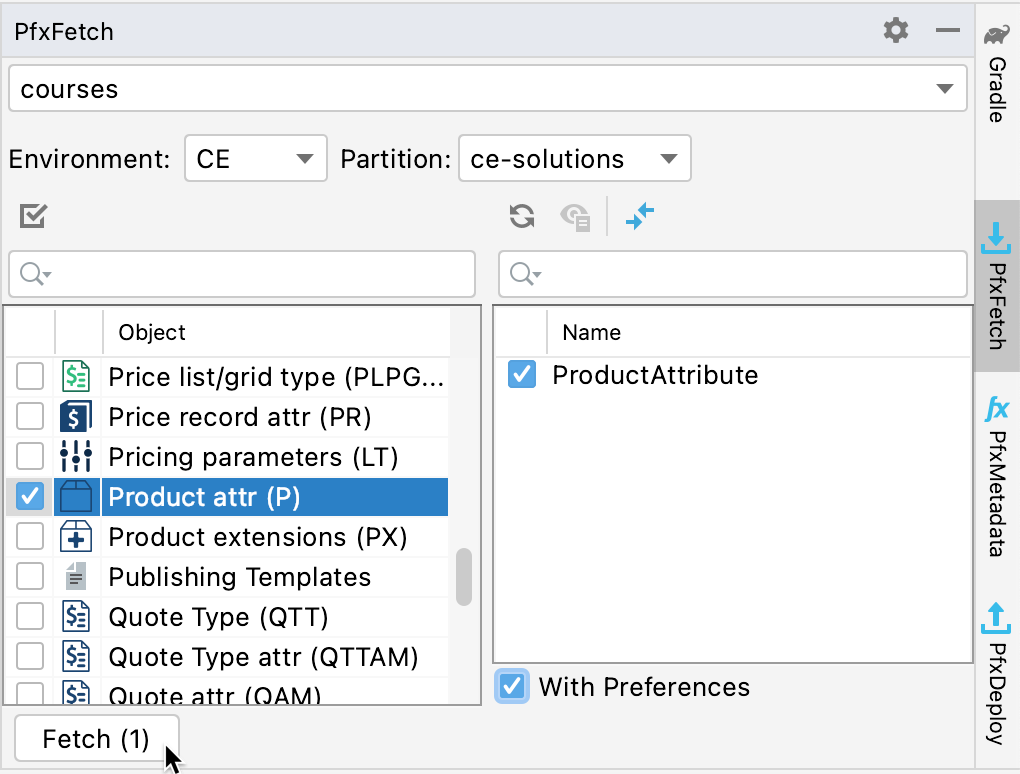
Fetch Products Fields Metadata to Your Project
If you already have your project set up in IntelliJ and the connection to partition is also set up, fetch the new fields metadata to your project, so you can store it in Git.
Fetch the new fields metadata to your project, including the Preferences.